How to Identify and Fix Engine Oil Leak From Head Gasket
Dealing with an engine oil leak from the head gasket can be stressful. Many car owners struggle with the worry of engine damage and costly repairs.
But don’t worry—you’re not alone, and there are ways to spot and fix the problem before it gets worse.
To identify an oil leak from the head gasket, look for signs like oil spots under the vehicle, smoke from the exhaust, or milky oil.
Inspect the engine bay for visible oil spills, check the oil cap, and examine spark plugs for oil deposits.
Confirm the leak by inspecting pooling oil or white smoke.
If you want to learn more about diagnosing and fixing the problem yourself, keep going for detailed steps.
Key Takeaways
- Look for oil spots, a burning smell, or milky oil to spot head gasket oil leaks. These signs can help you identify where the leak might be coming from.
- Check the engine bay, valve covers, and oil pan for fresh oil or seepage. A visual inspection can reveal leaks that need attention.
- Confirm the leak source by inspecting for oil pooling, the condition of the oil cap, and foul smell or deposits on the spark plugs.
- Carefully remove the old gasket and sealant using the right tools. Make sure to replace the gasket with a new one suited for your engine.
- During reassembly, ensure proper torque and alignment to prevent future leaks. Once done, verify the repair by checking for signs of new leaks.
Signs of a Head Gasket Oil Leak
A head gasket oil leak can be tricky to notice at first, but certain signs can alert you early on. Gasket failure often causes oil to seep into places it shouldn’t, leading to visible oil spots or puddles under your vehicle.
You might see oil on the engine surface or smell burning oil as it burns off hot engine parts. Another key sign is engine overheating, which happens when a gasket leak disrupts the cooling system’s efficiency.
Oil on the engine or burning smell signals a head gasket leak and potential engine overheating.
If your engine runs hotter than usual or the temperature gauge spikes, it’s a red flag. You may also notice white smoke from the exhaust or a milky appearance in the oil, indicating coolant mixing with oil due to gasket failure.
Pay close attention to these signs, as early detection can prevent more serious damage and costly repairs. Recognizing these symptoms helps you take timely action to address the head gasket oil leak.
How to Inspect Your Engine for Oil Leaks
First off, take a good look at your engine and see if you notice any signs of oil leaks. Pay special attention to the seals and gaskets since those are common spots for leaks to happen. You’re looking for any fresh oil traces, wet spots, or grime buildup—things that might suggest oil is sneaking out. Spotting these clues can really help you figure out exactly where the oil is escaping from.
Visual Inspection Techniques
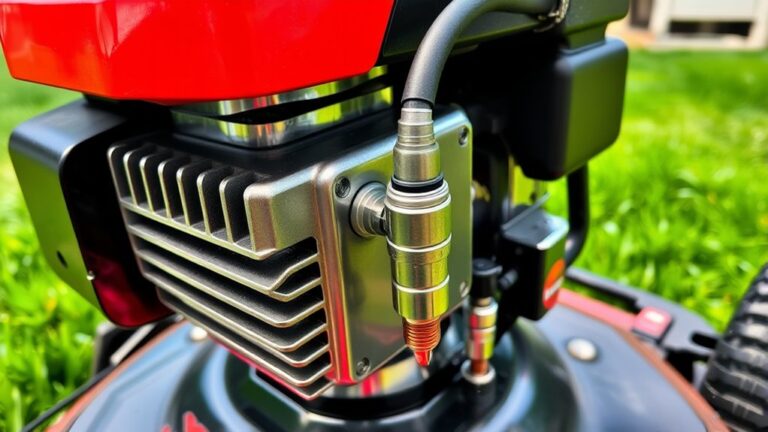
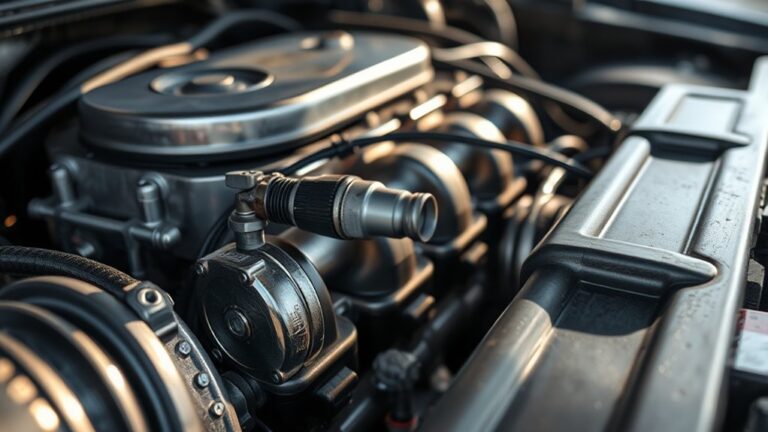
To identify an engine oil leak, start with a thorough visual inspection of your engine bay. Look for oil stains, wet or shiny spots, and grime buildup around the head gasket area.
Carefully examine valve covers, cylinder heads, and the oil pan for signs of fresh oil or seepage. Also, check hoses and fittings for cracks or loose connections, which can cause leaks.
Use a flashlight to spot hard-to-see areas and look for dripping oil or oily residue. Pay special attention to gaskets, seals, and bolts where leaks often develop.
This hands-on approach helps you quickly and accurately find the leak source, making repairs easier.
Checking for Oil Traces
When checking for oil traces, it’s important to carefully inspect your engine for signs of fresh oil that could indicate a leak. Look for oil stains on engine parts like the valve cover or nearby areas, which can point to a leak.
Pay close attention to gasket surfaces—discolored or oily spots often show where the leak might be coming from. Use a flashlight to check those hard-to-see spots, and wipe away dirt or grime to make fresh oil easier to spot.
How to Confirm the Oil Leak Is From the Head Gasket
Wondering if your engine oil leak comes from the head gasket? Look for signs like oil pooling around the engine or visible oil residue on the engine block and cylinder head. These are common indicators of a gasket leak.
You can also do a simple test: check the oil cap. If it looks milky or frothy, that suggests coolant is mixing with the oil because of gasket failure.
Next, inspect the spark plugs—if they’re fouled or have oil deposits, it’s a strong sign of head gasket issues.
Another clue is white smoke coming from the exhaust, which usually means coolant is entering the combustion chamber.
Putting all these signs together helps confirm if the leak is from the head gasket rather than another part.
Common Causes of Head Gasket Oil Leaks
Head gasket oil leaks often come from a mix of mechanical wear and external factors that put stress on the gasket over time. One common cause is the breakdown of gasket materials, especially if they’re made from composites or rubber that degrade with heat and age.
Over time, these materials can crack, warp, or become brittle, which leads to oil seeping out. Spotting early signs, like oil spots around the gasket area or a milky residue on the engine, can help you catch the problem early.
Excessive engine heat and pressure also put strain on the gasket, causing leaks. Plus, engine vibrations from rough driving or misfires can weaken the gasket’s seal. Poor installation or using low-quality gasket materials during repairs can speed up the leak process.
Understanding these causes helps you address the issue quickly before it gets worse. This way, your engine stays sealed and runs smoothly.
Tools and Materials Needed for DIY Repair
To successfully fix an engine oil leak caused by a faulty head gasket, you’ll need a specific set of tools and materials. First, gather essential hand tools like a socket set, screwdrivers, and a torque wrench for proper gasket sealing.
You’ll also need a gasket scraper to remove old gasket residue and a cleaning solvent for surface prep. Safety gear such as gloves and safety glasses is vital to protect yourself during the process.
| Tools | Materials |
|---|---|
| Socket set | Replacement head gasket |
| Screwdrivers | Oil viscosity additive |
| Torque wrench | Gasket sealing sealant |
| Gasket scraper | Cleaning solvent |
Make sure you have the right tools to handle gasket sealing properly. Using the correct oil viscosity during reassembly helps prevent future leaks.
Proper tools and materials make your repair easier and more effective, reducing the chance of errors.
How to Fix a Head Gasket Oil Leak
Fixing a head gasket oil leak requires a systematic approach to ensure a proper seal and prevent further damage. First, verify that the leak actually comes from the head gasket. Once you’re sure, inspect the gasket materials involved; different types like rubber, composite, or metal need specific repair techniques.
If you’re experienced, you might consider replacing the gasket yourself. Carefully clean the surfaces and apply a new gasket material suited for your engine. Use a gasket sealant if the manufacturer recommends it, making sure it’s compatible with your gasket material.
When installing the new gasket, follow the torque specifications to avoid uneven sealing. Proper leak detection during reassembly is essential—look for any signs of residual leaks. Remember, thorough cleaning of the mating surfaces helps ensure a better seal.
Taking these steps will help restore the head gasket’s integrity and prevent further oil leaks.
Repair Options: When to DIY or Call a Professional
Deciding whether to tackle a head gasket oil leak yourself or call in a professional depends on your skill level and how complex the repair is. If you have mechanical experience and the right tools, a DIY fix might save you some money.
Choose DIY or professional repair based on your skill level and repair complexity.
But keep in mind that head gasket repairs are tricky, time-consuming, and need a lot of precision. A professional can diagnose the issue accurately, give expert advice, and make sure the repair is done properly.
When you compare costs, DIY repairs might seem cheaper upfront. However, if not done right, they could lead to costly mistakes later. Professional repairs tend to be more expensive at first but usually reduce the risk of future leaks or engine damage.
If you’re unsure about your skills or if the repair involves a lot of disassembly, it’s best to call a professional. Ultimately, weighing your mechanical know-how against the risks and costs will help you decide the best way to go.
Preventing Head Gasket Oil Leaks in the Future
Preventing head gasket oil leaks starts with proper maintenance and mindful driving habits. Regular inspections help you catch early signs of gasket wear or damage before leaks develop. Schedule routine check-ups to monitor engine oil levels and look for any signs of oil seepage around the head gasket area.
Using high-quality engine oil and replacing it at recommended intervals reduces strain on the gasket and prevents buildup that can cause leaks. Keep the cooling system in good condition since overheating can weaken the gasket material over time.
Avoid aggressive driving or sudden stops that put extra stress on engine components. Staying attentive to changes in engine performance or unusual oil spots under your vehicle can alert you to potential issues early.
Signs Your Head Gasket Repair Was Successful
Wondering if your head gasket repair was successful? You’ll want to look for clear signs that show the repair worked.
One of the main indicators is the absence of oil leaks around the gasket area. If you no longer see oil seeping or pooling, that’s a good sign the gasket is holding up well.
Also, check your coolant levels. If they stay stable without dropping, it probably means the head gasket is sealed properly.
Pay attention to your engine’s performance too. Smooth operation without overheating or misfires suggests the repair was effective.
Finally, do a thorough inspection for any residual oil or coolant mixing. If you don’t see any, it confirms the gasket is doing its job.
Remember, a successful repair isn’t just about fixing the leak. It’s about making sure the gasket’s integrity is restored so it won’t leak again soon.
If you notice these signs, you can be confident your head gasket repair was successful.
Troubleshooting Persistent Oil Leaks After Repair
If oil keeps leaking after your repair, first take a look at the gasket. Make sure it was installed correctly and seated properly—sometimes a simple misalignment can cause leaks.
Next up, check the oil seal for any signs of damage or wear. If it’s compromised, that could very well be the culprit.
Finally, don’t forget to verify that all bolts and components are tightened to the manufacturer’s specifications. Overlooking this step can lead to lingering issues that are easy to miss.
Check Gasket Installation Properly
Even when you’ve replaced the gasket, a persistent oil leak often points to installation issues. Start by checking the gasket alignment—make sure it sits properly within the gasket seat without shifts or twists. Misalignment can cause gaps that lead to leaks.
Next, verify that the gasket was torqued according to the manufacturer’s specifications. Over-tightening can deform the gasket, while under-tightening leaves it loose. Use a torque wrench to apply the correct pressure evenly across all bolts, following the specified sequence.
Double-check that all bolts are tightened to the recommended torque. Any deviation can compromise the seal, resulting in leaks. Proper gasket alignment and adherence to torque specifications are essential steps in ensuring a reliable, leak-free seal after installation.
Inspect Oil Seal Condition
After ensuring the gasket is properly installed and torqued, the next step is to check the oil seals. These seals can be lip seals, shaft seals, or valve cover seals, depending on where they are located and their purpose.
Look for signs of damage, cracking, or hardening, which can indicate wear and possible leaks. If the seals seem compromised, you’ll need to replace them.
Carefully remove the old seal to avoid damaging nearby parts. Then, install a new seal that matches the original specifications. Proper installation ensures a tight fit and helps prevent oil from leaking out.
Confirm Correct Torque Settings
Making sure you get the right torque settings during reassembly is key to avoiding persistent oil leaks. If your head gasket repair didn’t hold, double-check the torque specs for your engine.
Use a torque wrench to set the correct torque according to the manufacturer’s recommendations. Be careful not to under-tighten or over-tighten the bolts.
Follow the tightening sequence recommended by the manufacturer to prevent uneven tightening. After the initial startup, recheck the torque to make sure it’s still within the proper range.
Proper torque ensures the gasket seals properly and helps prevent leaks from coming back.
Frequently Asked Questions
Can Engine Oil Leaks From Other Sources Mimic a Head Gasket Leak?
Oil leak causes can sometimes mimic a head gasket leak, making it tricky to identify the true source. For example, leaks from valve cover gaskets or oil pan seals can look similar, especially with gasket symptoms like oil spots or burning smells.
You should inspect the engine carefully for other signs, like coolant mixing with oil or white exhaust, to accurately diagnose if the leak isn’t from the head gasket. Sometimes, other leaks can fool you, so it’s good to check everything thoroughly.
How Long Does a Typical Head Gasket Oil Leak Repair Take?
Fixing a head gasket oil leak can feel like repairing a rocket engine—complex and time-consuming. Typically, the repair takes about 8 to 12 hours, depending on your vehicle’s model and the mechanic’s experience.
You should plan for a full day or even more, as professionals carefully disassemble, replace, and reassemble parts to make sure the leak is gone for good. Patience is definitely key here!
Will Fixing a Head Gasket Oil Leak Affect Engine Performance?
Fixing a head gasket oil leak generally improves your engine’s performance because it prevents oil loss and ensures proper sealing. You might notice smoother operation and better efficiency afterward.
The repair also helps prevent further damage, reduces engine wear, and restores your vehicle’s power. While the process can temporarily affect performance during repairs, the long-term impact is positive.
Are There Any Long-Term Risks if I Ignore a Head Gasket Oil Leak?
Ignoring a head gasket oil leak can lead to serious long-term damage. It increases the risk of engine overheating, warped components, and even engine failure.
If you neglect it, you might face costly repairs down the road. It’s best to address the leak quickly to prevent more damage.
Regular maintenance and catching issues early can save you money and keep your engine running smoothly. Ignoring these problems can lead to hefty repair bills later on.
What Are the Signs of a Failed Head Gasket Repair?
When a head gasket repair fails, you’ll notice signs like coolant mixing with oil, giving it a milky appearance, and constant overheating.
You might also experience a loss of engine power or see white smoke coming from the exhaust.
To be sure, do a pressure test on the cooling system. If it loses pressure, the gasket may still be compromised.
Ignoring these signs can cause serious engine damage, so it’s best to address them quickly.
Conclusion
Think of your engine as a beating heart; when its head gasket leaks, it whispers signs of distress. By listening closely—spotting the signs, inspecting carefully, and acting quickly—you keep the lifeblood flowing smoothly.
Whether you fix it yourself or call in a pro, your attentive care restores the engine’s rhythm. Remember, a well-maintained head gasket is the shield that keeps your car’s heart healthy, ensuring many more journeys ahead.