How to Put a Graco Car Seat Back Together: Step by Step Guide
Many parents find themselves overwhelmed when it’s time to put their Graco car seat back together. You’re not alone—reassembling a car seat can feel confusing and tedious.
But don’t worry, with a little patience and some guidance, you can do it right.
To put your Graco car seat back together, gather all parts and tools, then follow the manual’s guidance. Reattach the harness and buckle, making sure straps are smooth and correctly positioned.
Reinstall the seat cover and padding, and secure all fastening mechanisms, like screws and locking levers. Double-check everything for tightness and proper placement.
If you want detailed steps on each part of the process, continue exploring the complete guide for safe reassembly.
Key Takeaways
- Gather all the parts of your car seat, along with any tools you might need. Check the manual to make sure everything goes back together correctly.
- Reattach the harness, buckle, and seat cover, making sure there are no twists and that everything is positioned properly.
- Inspect the recline and adjustment mechanisms, then reinstall and lock them securely in place.
- Tighten all fasteners, screws, and connectors to ensure everything is safe and secure.
- Finally, test the seat’s stability and safety features. Do a quick routine maintenance check to keep it in good shape for the future.
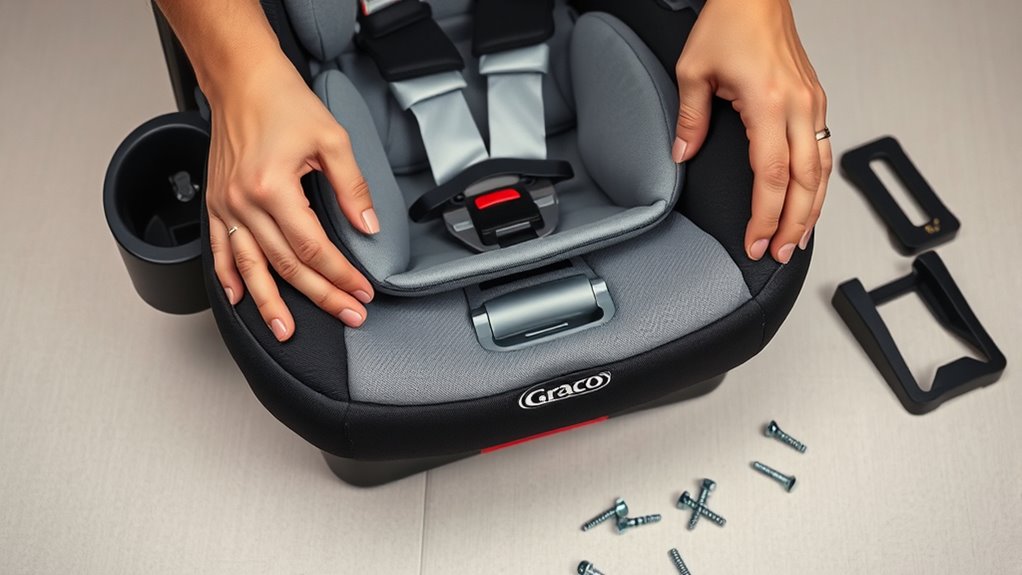
Gather All Parts and Tools Needed for Reassembly
Before you start reassembling your Graco car seat, gather all the parts and tools you’ll need. Making sure everything is ready is really important for safety and smooth assembly.
Check that you have all the key components, like the harness, padding, and base, along with any screws or clips. Set aside tools like screwdrivers or Allen wrenches if needed.
Ensure all key parts—harness, padding, base—and necessary tools are ready before reassembling your car seat.
Organize everything in a clean, clutter-free space so you won’t lose any pieces. Double-check the manufacturer’s manual if you have it, to make sure you have everything.
Getting all your parts together beforehand helps prevent mistakes that could affect safety. It also makes the process quicker, so you can focus on fitting everything securely.
Taking this step seriously ensures your car seat is reassembled correctly and keeps its safety features intact. This preparation is essential for keeping your child safe on every ride.
Review Your Car Seat Manual and Identify Key Components
First, grab your car seat manual and flip to the section that talks about assembly or reassembly. It’ll give you the specific instructions you need to follow. Once you’ve got that, take a look at the key parts you’ll be working with — things like the harnesses, buckles, and any other components that need to go back in place.
After you’ve identified everything, check out the assembly diagram in the manual. It’s super helpful because it shows you exactly how all the pieces fit together. This way, you’ll have a clear picture of the proper way to reassemble your car seat without any confusion.
Locate Manual Section
To effectively reassemble your Graco car seat, you need to familiarize yourself with the manual section dedicated to assembly and parts.
The manual’s importance cannot be overstated, as it provides detailed diagrams and instructions essential for proper reassembly. Start by locating the specific section that covers assembly tips and parts identification.
This section guides you through the correct placement of components and highlights safety features to watch for. Familiarizing yourself with this part of the manual guarantees you understand the sequence and avoid common mistakes.
Keep it handy during reassembly, and refer back if you encounter any uncertainties. A clear understanding of the manual’s instructions helps you put the car seat back together confidently and correctly, safeguarding your child’s safety.
Identify Key Parts
Reviewing your car seat manual helps you become familiar with its key components. This step makes sure you understand the features essential for safety and proper assembly.
Start by identifying the main parts, like the harness system, headrest, base, and recline mechanism. Pay attention to how these pieces fit together and their safety standards.
Here are some key parts to look for:
- Harness straps and buckle, which are critical for securing your child.
- Headrest and side wings that provide side-impact protection.
- Base and recline adjuster to ensure a proper fit in your vehicle.
- LATCH connectors for safe, easy installation.
Knowing these parts helps you confidently reassemble the seat and verify it meets safety standards.
Understand Assembly Diagram
Your car seat manual includes an assembly diagram that’s essential for understanding how all the parts fit together. Take time to review this diagram carefully, as it guides you through the correct assembly process.
Focus on diagram interpretation by identifying each component and noting how they connect. Use the diagram to confirm the location of key parts like the harness, shell, and base.
Here’s a quick overview:
| Part Name | Location/Connection | Assembly Tip |
|---|---|---|
| Harness | Attached to shell | Verify proper threading for safety |
| Base Plate | Bottom of car seat | Secure tightly to avoid movement |
| Side Panels | Enclose the shell | Snap into place firmly |
Understanding this diagram simplifies reassembly and minimizes mistakes.
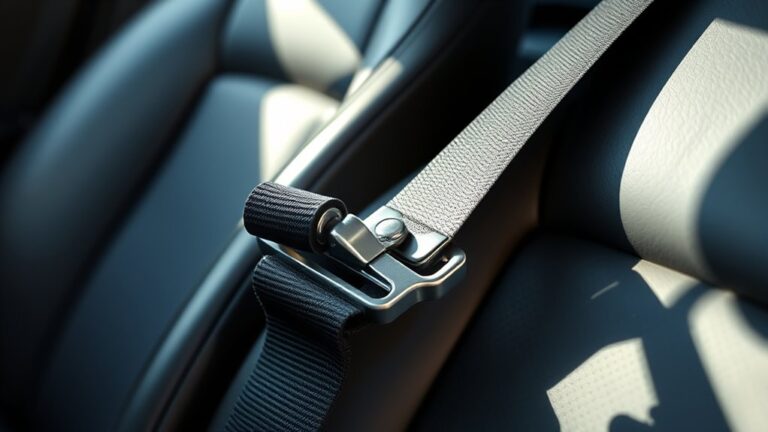
Reattach the Harness and Buckle System Correctly
Reattaching the harness and buckle system correctly is key to keeping your child safe and comfortable. Making sure the harness is properly adjusted and the buckle is in the right place is an important step.
Properly reattaching the harness and buckle ensures your child’s safety and comfort during every ride.
Here’s what you should do:
- Secure the harness straps into their guides, making sure they lie flat without twists.
- Adjust the harness height so the straps are at or just below your child’s shoulders, ensuring a snug fit.
- Position the buckle in the correct slot that matches your child’s size, and lock it securely.
- Test the buckle placement by pulling on the straps to make sure they don’t slip or loosen.
Always double-check that the harness is tight enough to keep your child secure and that the buckle clicks firmly into place. Doing this right ensures maximum safety during every ride.
Make Sure the Seat Cover and Padding Are Properly Positioned
Ensuring the seat cover and padding are properly positioned is key for both comfort and safety. Start by smoothing out the seat fabric, making sure there are no wrinkles or bunches that could cause discomfort or interfere with the harness system.
Gently stretch the cover over the padding, aligning it with the seat’s contours. Check that the padding sits evenly and securely without shifting. Misplaced padding can compromise safety features and make for an uncomfortable ride.
Take your time to adjust the cover so it fits snugly, with all edges tucked neatly into the seat frame. This not only keeps the seat looking good but also helps maintain its safety integrity.
Reinstall and Test the Recline and Adjustment Mechanisms
After you’ve secured the seat cover and padding, it’s important to reinstall the recline and adjustment mechanisms carefully. Proper reattachment ensures safe and effective recline adjustment.
Follow these steps to do it right:
- Align the recline adjustment lever or button with its slot on the seat shell.
- Push or slide the mechanism into place until it clicks or locks securely.
- Gently tilt the seat to different positions to check the recline adjustment. Confirm it holds the desired angle.
- Test the mechanism by adjusting the recline multiple times. Make sure it moves smoothly and stays in place when set.
This process guarantees the recline adjustment features work properly, providing safety and comfort. Always double-check that the mechanism is securely engaged before moving on.
Secure the Base to the Seat Shell Safely
Once you’ve confirmed the recline and adjustment mechanisms are secure and working properly, it’s time to attach the base to the seat shell. Align the base with the seat’s designated anchor points, making sure it sits flush against the shell.
Check that the leveling indicator is in the proper position and that the base doesn’t move too much when you push on it. If your car seat uses LATCH connectors, latch them in firmly and listen for the click to know they’re secure.
For models with a seat belt installation, thread the belt through the correct path, tighten it snugly, and lock the belt to prevent movement. Then, do a safety check by gently rocking the base to ensure it’s stable.
Proper attachment is key to safety and helps prevent unwanted movement during travel. Take your time to double-check all connections before moving on.
Double-Check and Tighten All Screws and Connectors
Hey, just make sure you double-check all the screws and connectors. It’s always a good idea to see if everything’s properly attached and secure. You don’t want anything feeling loose when you’re using it.
And don’t forget to use the right tools for tightening those screws. That way, you can prevent any problems later on and make sure everything stays tight and safe.
Inspect All Fasteners
Begin by carefully examining all fasteners, including screws, bolts, and connectors, to guarantee they are secure. Confirm each fastener type matches the original specifications and meets safety standards. Loose or missing fasteners can compromise the car seat’s safety, so double-check their tightness.
Here are four steps to guide you:
- Inspect all screws and bolts for signs of wear or damage.
- Confirm connectors are fully engaged and seated properly.
- Tighten any loose fasteners using the appropriate tools.
- Verify that all fasteners are flush and not protruding.
This process helps ensure your car seat maintains its integrity and safety. Properly inspecting all fasteners prevents potential hazards and keeps your child secure during travel.
Confirm Secure Connections
Double-checking all screws and connectors guarantees your car seat is properly secured before use. Make sure every fastener is tight and properly engaged, following your assembly tips to verify secure connections.
Loose screws or connectors can compromise safety, so give each one a firm tighten with your hands or appropriate tools. Check that all parts click or lock into place, and don’t forget to inspect areas where parts connect or pivot.
Confirm that no components wobble or shift, which could mean a loose connection. Properly secured connections are essential for the safety and stability of your car seat.
Take your time to double-check each connection, and if anything feels loose, tighten it again until everything is firm and secure. This step ensures your car seat is safe and ready for use.
Use Appropriate Tools
Using the right tools is essential for ensuring all screws and connectors are properly tightened. Choosing the correct tools helps you avoid damage and keeps things safe.
Make sure you have these essential tools on hand:
- A Phillips screwdriver for most screws on the car seat
- A flat-head screwdriver for specific connectors or stubborn screws
- A torque wrench to tighten screws to the manufacturer’s recommended specifications
- An Allen wrench set for any hex bolts involved
Picking the right size and type of tools prevents stripping screws or damaging parts. Always double-check that your tools are in good condition before you start.
Using proper tools guarantees a secure, safe assembly every time.
Test Your Reassembled Car Seat for Proper Function and Security
Once you’ve reassembled the car seat, it’s important to test it thoroughly to make sure everything works properly and stays secure. Start by inspecting the safety features, like the harness system, to confirm they’re engaged and adjustable.
Check that the buckle clicks securely and releases smoothly. Then, test the recline and positional adjustments to ensure they lock firmly into place. Follow the installation tips carefully—make sure the seat is tightly secured with either the seat belt or LATCH system, with minimal movement side to side or front to back.
Verify that all components, including the harness, straps, and padding, are correctly aligned and securely attached. Conduct a manual shake test to confirm the entire seat doesn’t shift excessively. By carefully testing each part, you help ensure your child’s safety and give yourself peace of mind while traveling.
Tips for Maintaining Your Graco Car Seat After Reassembly
To keep your Graco car seat in great condition, it’s a good idea to clean it regularly. Just a quick wipe-down now and then can help get rid of dirt and debris, making sure everything stays fresh and safe for your little one.
It’s also important to do safety checks from time to time. Make sure all the parts are secure and working properly—this way, you can catch any issues early and keep your child safe.
Sticking to these simple routines not only helps protect your kid but also makes your car seat last longer, so you get the most out of your investment.
Regular Cleaning Practices
Regular cleaning is crucial to keep your Graco car seat safe and in good condition after reassembly. Proper maintenance boosts hygiene, prolongs the product’s life, and ensures safety features work properly.
Use these tips for effective cleaning:
- Regularly remove and wash fabric covers with gentle techniques to prevent stains and odors from building up.
- Spot clean with mild soap and water to handle stains without damaging the fabric.
- Vacuum crevices and harnesses to remove dirt and debris, keeping the seat hygienic.
- Air out the seat often to reduce odors and help preserve the fabric.
Following these tips helps keep your car seat safe, clean, and ready for every trip.
Periodic Safety Checks
After reassembling your Graco car seat, it’s important to do regular safety checks to make sure everything stays secure and works correctly. These inspections help catch problems early and prevent accidents.
Focus on checking the harness to ensure straps are tight and correctly positioned. Also, verify that all locking mechanisms engage smoothly. Conduct these checks monthly or after any rough use.
Use the table below to guide your safety routine:
| Safety Inspection Task | When to Perform | Why It Matters |
|---|---|---|
| Check harness tightness | Monthly | Prevents slippage during a crash |
| Inspect buckle functionality | Monthly | Ensures secure fastening |
| Examine harness straps | After each use | Detects wear or damage |
| Verify seat stability | Quarterly | Maintains overall safety |
Staying vigilant with these safety checks helps protect your child’s well-being.
Troubleshooting Common Reassembly and Safety Issues
When reassembling a Graco car seat, it’s common to run into issues that might compromise safety or functionality. To avoid problems, make sure you follow proper reassembly tips and double-check each step.
First, verify that you’ve correctly identified each component so everything is assembled in the right order. Next, check the harness system—ensure straps are threaded properly and secured tightly.
It’s also important to confirm there are no installation errors by following safety regulations carefully. Lastly, inspect all parts for any loose or damaged pieces that could affect the seat’s integrity.
Frequently Asked Questions
Can I Reassemble My Graco Car Seat Without Professional Help?
You can reassemble your Graco car seat without professional help if you carefully follow all safety and reassembly tips.
Make sure to read the manufacturer’s instructions thoroughly, so you understand each step clearly. Double-check all parts for damage before putting everything back together.
Verify that everything clicks securely into place to ensure the seat is safe to use.
If you’re unsure about any step or notice signs of wear, it’s best to consult a professional.
Proper reassembly is crucial for your child’s safety on every ride.
How Often Should I Inspect My Car Seat After Reassembly?
You should check your car seat weekly, just like a careful guardian looking out for your child’s safety. Regular inspections make sure all parts stay secure and work correctly.
Make it a habit to look at the straps, buckles, and harness system for any signs of wear or damage. Doing this helps prevent accidents and keeps your little one safe.
Following a routine like this gives you peace of mind during every car ride, knowing your child is protected.
Are There Specific Tools Recommended for Reassembling the Seat?
For car seat maintenance and reassembly, you generally don’t need special tools—just your hands and sometimes a screwdriver if required.
Always check your user manual for specific reassembly tips because some models might need particular tools or parts.
Make sure all components click securely into place. Regular inspections help ensure your seat stays safe and functional.
Keep an eye out for loose parts or signs of wear during reassembly to maintain safety.
What Are the Signs of a Correctly Reassembled Car Seat?
You’ll know your car seat is correctly reassembled if it passes safety checks, like making sure all parts are securely attached and the harness moves smoothly.
Follow installation tips to double-check the seat’s stability by giving it a firm shake and feeling for any looseness.
Look for clear indicator marks and test the adjustability to ensure everything is working properly.
Regular safety checks help confirm that everything’s in place, keeping your child safe during every ride.
Can I Reuse All Parts if Some Are Damaged During Reassembly?
You shouldn’t reuse any parts if they’re damaged during reassembly because it can compromise the car seat’s safety. Damaged components might weaken the seat’s structure or reduce its effectiveness.
It’s best to replace broken or worn parts with manufacturer-approved replacements before putting everything back together. Making sure all parts are in good condition helps ensure the car seat functions properly.
This way, you can keep your child safe during every ride without worries.
Conclusion
And there you have it—your perfectly reassembled Graco car seat, ready for more adventures or at least a few more trips to the store. Who knew putting it back together could be almost as easy as installing it in the car?
Just remember, all those tiny screws and clips are like your car’s tiny, overachieving team. Keep them tight, and they’ll keep your little one safe. Happy travels!
And don’t forget to double-check everything. Safety’s no joke, even if reassembly feels like a puzzle. With your Graco car seat all set, you’re good to go for the next trip.