How to Hook Up a Battery Charger: Easy Step by Step Guide
Many car owners have faced the frustrating moment when their vehicle’s battery dies, and they’re left scrambling to get it back up and running. If that sounds familiar, you’re not alone—dealing with dead batteries can be stressful and confusing, especially if you’re unsure how to safely hook up a battery charger.
Luckily, with a little know-how, you can handle this task confidently.
To hook up a battery charger safely, wear gloves and eye protection, then turn off your vehicle and disconnect any electronic devices.
Locate the battery terminals, verify correct polarity, and clean any corrosion. Attach the red clamp to the positive terminal first, then connect the black clamp to the negative terminal.
Set your charger, monitor the process, and disconnect safely by removing the negative clamp first.
For detailed steps and safety tips, keep going—you’ll find all you need to know.
Key Takeaways
- Make sure the vehicle is off, the parking brake is on, and wear safety gear before you start.
- Find and double-check the positive and negative terminals on the battery.
- Connect the red clamp to the positive terminal first, then attach the black clamp to the negative terminal.
- Follow the manufacturer’s instructions to set up the charger, and keep an eye on the charging indicators.
- When you’re ready to disconnect, turn off the charger first, then remove the negative clamp, followed by the positive—this keeps things safe.
How to Prepare Safely to Jumpstart or Charge Your Vehicle Battery
Before you connect a battery charger or try to jumpstart your vehicle, safety should be your top priority. Proper battery maintenance helps prevent accidents and makes your battery last longer.
Wear safety gear like gloves and eye protection to guard against acid leaks or sparks. Check the battery for cracks, corrosion, or leaks; don’t proceed if you find any damage until it’s repaired.
Make sure your vehicle is turned off and the parking brake is engaged. Keep flammable materials away from the engine area. Read the charger’s instructions carefully to understand all safety precautions.
Work in a well-ventilated area, especially if you’re indoors. Disconnect any electronic devices to prevent surges. Following these safety steps minimizes risks and keeps you safe.
Taking these precautions now helps you avoid potential hazards later. Staying cautious ensures your battery maintenance is safe and effective.
Identify and Connect the Correct Battery Terminals
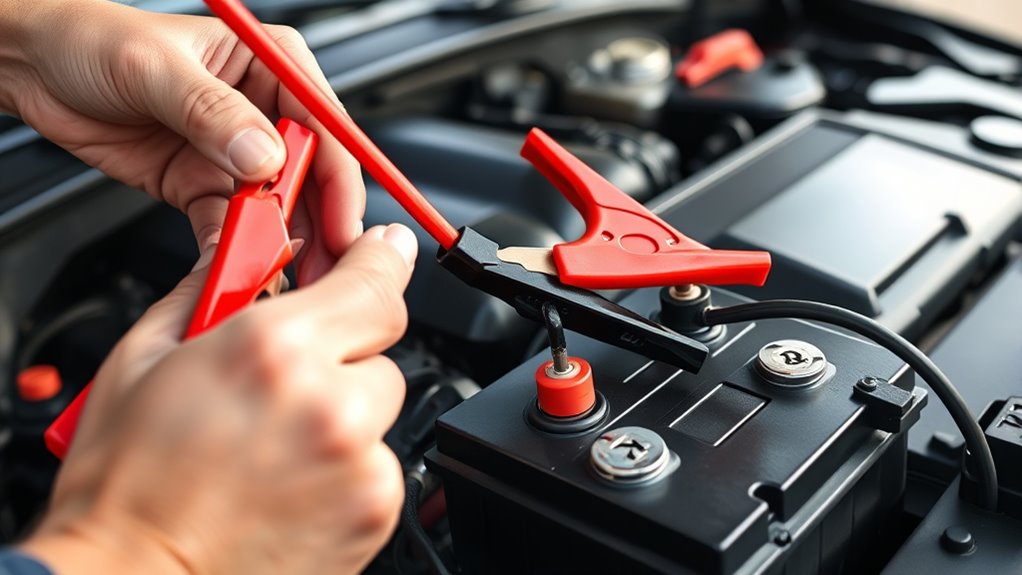
First off, find the battery terminals on your vehicle. They’re usually marked with a plus (+) sign for the positive terminal and a minus (−) sign for the negative terminal. It’s a good idea to double-check these signs so you’re connecting everything correctly. Connecting the wrong way can cause sparks or even damage, so it’s worth taking a moment to be sure.
Once you’ve got the right terminals identified, attach the charger clamps carefully. Make sure the clamp for the positive terminal is connected to the positive (+) side, and the same goes for the negative. Firmly secure the clamps so they don’t slip off during charging. Taking these simple steps can save you trouble and keep everything safe.
Locate Battery Terminals
To properly connect your battery charger, you need to identify the positive and negative terminals on your vehicle’s battery. Battery terminal types vary, so look for symbols or labels—usually a plus (+) for positive and minus (–) for negative.
The positive terminal often has a red cover or marking, while the negative is black. Check for terminal corrosion, which can make identification tricky; clean any corrosion with a wire brush if necessary.
Make sure you’re confident about which terminal is which before proceeding. Properly locating these terminals guarantees you connect your charger correctly and safely, preventing potential damage or sparks.
Take your time to verify the terminals to ensure a smooth and safe charging process.
Confirm Polarity Correctly
Once you’ve identified the battery terminals, double-check that you’ve got the right ones before making any connections. Different battery types, like lead-acid or AGM, may have slightly different setups, but confirming polarity is universal.
Always connect the positive (red) clamp to the positive terminal and the negative (black) clamp to the negative terminal. Incorrect polarity can cause sparks, damage the battery, or even safety hazards.
Verify the terminals are clean and free of corrosion to guarantee good contact. Remember, the charging method depends on correct polarity; some batteries require specific procedures.
Taking this extra step guarantees your charger works safely and effectively, preventing costly mistakes or damage during the charging process. Accuracy now saves trouble later.
Connect Clamps Securely
Before connecting the clamps, carefully identify the positive and negative terminals on the battery. Proper connection techniques are key for safety and effective charging.
Use the correct clamp types, usually alligator clips, to ensure a secure hold. When attaching, connect the red clamp to the positive terminal first, then the black clamp to the negative terminal.
Make sure the clamps are firmly gripping the terminals without slipping. Keep the clamps away from each other to prevent accidental contact.
Double-check that each clamp is securely attached to the correct terminal before turning on the charger. Properly connected clamps prevent sparks and ensure a safe charging process.
Choose the Right Battery Charger for Your Vehicle
Choosing the right battery charger for your vehicle depends on understanding its specific power needs and compatibility. First, think about the battery charger types—like trickle chargers, fast chargers, or smart chargers—each suited for different situations.
Next, look at the charger power ratings. These ratings show how quickly the charger can restore your battery’s charge. Higher ratings mean faster charging but can be risky if they’re too powerful for your battery.
Here’s a quick comparison:
| Charger Type | Power Rating Range | Ideal Use |
|---|---|---|
| Trickle Charger | Low (1-10 amps) | Maintenance and long-term charging |
| Fast Charger | High (10+ amps) | Rapid charging for emergencies |
| Smart Charger | Variable | Safe, automatic shut-off |
Match your vehicle’s battery specs with these factors to ensure safe, efficient charging without risking damage to your battery or charging system.
Set Your Charger and Follow Safety Precautions
Before you plug in your charger, double-check that it’s the right one for your battery. You want to make sure it’s compatible so you don’t accidentally cause any damage. It’s always a good idea to wear protective gear just to stay safe while handling batteries and chargers.
Also, take a few minutes to read the manufacturer’s instructions carefully. Knowing the proper steps can make the whole process much smoother and safer. Following these simple tips helps ensure your charging experience is both safe and hassle-free.
Verify Charger Compatibility
Verifying your charger is compatible with your battery is a crucial first step to prevent damage or safety hazards. You need to check that the charger’s features match your battery’s requirements, especially considering different battery types like lead-acid, AGM, or lithium-ion.
Confirm that the voltage and amperage ratings align with your battery’s specifications. Look for these key points:
- Compatibility with your specific battery type
- Correct voltage and amperage ratings
- Proper connector type for your battery
- Safety features like overload protection
Matching charger features to your battery type and specifications ensures safe, efficient charging. Using an incompatible charger can cause damage or safety risks, so double-check these details before proceeding.
Wear Protective Gear
To protect yourself and ensure safe charging, it’s important to wear the right protective gear before setting up your charger.
Put on protective gloves to shield your skin from sparks or accidental contact with battery acid.
Safety goggles are just as vital to guard your eyes against splashes or sparks that might happen during connection.
These precautions help prevent injuries from unexpected sparks or leaks.
Make sure your gloves are non-conductive to avoid electrical shocks.
Keep your goggles on throughout the setup to stay safe.
Taking these simple steps reduces the risk of accidents and keeps you safe when working with batteries.
Read Manufacturer Instructions
Always start by reading the manufacturer’s instructions that come with your battery charger, as they contain essential safety information and specific setup steps.
Different charger types may have unique features or precautions, so following the instructions guarantees safe operation and effective battery maintenance. Pay attention to guidelines on voltage settings, connection points, and recommended charging times.
Properly setting up your charger helps prevent damage to your vehicle’s battery or the charger itself. Understanding the manufacturer’s instructions also helps you avoid common mistakes that could cause safety hazards.
Before you begin, familiarize yourself with any warnings or safety tips. Doing so ensures a smoother process and prolongs your battery’s lifespan.
Monitor the Charging Process and Know When It’s Complete
As the battery charges, keeping an eye on the process helps prevent overcharging and potential damage. Monitoring the charging indicators and battery voltage is key for a safe, efficient charge.
Check the charger’s display or indicator lights regularly. They show whether the charging is still ongoing or if it’s complete. Using a multimeter to measure battery voltage periodically is helpful too.
Make sure the voltage reaches the recommended level, usually around 12.6V for a fully charged 12V battery. This way, you can disconnect the charger safely before overcharging occurs.
| Charging Indicator | Battery Voltage | Action Needed |
|---|---|---|
| Flashing light | Increasing | Continue charging |
| Steady light | 12.4V – 12.6V | Charging nearly complete |
| No indicator | 12.6V or higher | Disconnect charger |
Knowing when the indicators stabilize and the voltage hits the target helps you safely disconnect the charger and avoid damage.
Troubleshooting Common Battery Charging Problems
If your battery isn’t charging the way it should, the first step is to look out for some common issues. Sometimes, it could be something simple like the charger being faulty or plugged in incorrectly. It’s worth double-checking those connections to make sure everything’s secure and in the right place.
Also, take a quick peek at the terminals. If they’re dirty or corroded, it can really mess with the charging process. Cleaning those up and tightening loose connections can often fix the problem and get your battery charging smoothly again.
Identifying Charging Errors
Have you ever connected your battery charger only to find that it isn’t charging the battery properly? If so, start by checking the charging indicators on your charger. If they show no activity, the charger might not be working right.
Next, think about the battery’s health; an old or damaged battery may refuse to charge. Look for signs like corrosion or swelling. Also, make sure the connections are secure and free of dirt or rust.
Finally, double-check that you’re using the correct charger settings for your battery type. Common charging errors include misleading indicators, incompatible settings, poor connections, and a battery that’s no longer able to hold a charge.
Fixing these issues can help you quickly find the root cause and get your battery charging properly again.
Fixing Connection Issues
When your charger shows signs of activity but the battery still isn’t charging, connection issues might be to blame. Start by checking that the clamps are securely attached to the correct terminals—positive to positive, negative to negative. Loose or corroded connections can prevent proper charging.
Inspect the cables for damage or corrosion, and clean the terminals if needed. Also, verify that the charger’s settings match your battery type and capacity. Poor connection quality can sometimes hide underlying battery health problems.
If connection troubleshooting doesn’t fix the issue, consider testing your battery’s health. Ensuring solid, clean connections is key to effective charging and avoiding unnecessary damage or frustration.
Disconnect the Charger Safely and Properly
Before disconnecting your battery charger, make sure it has fully finished charging and the indicator lights show it’s safe to remove. Properly disconnecting helps manage discharge and extends your charger’s lifespan.
To do this safely, turn off the charger before removing the cables to avoid sparks or electrical issues. Always remove the negative (black) clamp first to reduce the risk of short circuits.
Next, carefully disconnect the positive (red) clamp. Store the charger in a cool, dry place to keep it in good condition and ready for next time.
Following these steps prevents unnecessary strain on your charger and helps avoid accidental sparks. Being cautious during disconnection supports better discharge management and protects your battery and charger from damage.
How to Maintain Your Battery and Extend Its Life
Proper maintenance is key to keeping your battery running smoothly and lasting longer. Regular care helps prevent issues like corrosion, sulfation, and capacity loss.
Follow these simple tips to extend your battery’s life:
| Tip | Action | Benefits |
|---|---|---|
| Clean terminals | Use a wire brush and baking soda solution | Better connection and longer life |
| Check fluid levels | Top off with distilled water if needed | Prevents damage and sulfation |
| Keep it charged | Avoid letting the battery fully discharge | Maintains capacity and health |
| Store properly | Keep in a cool, dry place when not in use | Reduces wear and tear |
| Inspect regularly | Look for corrosion or leaks | Catch issues early |
What to Do If You Connect the Terminals Incorrectly?
Connecting the battery terminals incorrectly can cause immediate issues, so it’s important to act quickly and carefully. If you realize you’ve made a mistake and connected the terminals with reverse polarity, stop charging immediately. Continuing can lead to battery damage or even dangerous sparks.
To address this, disconnect the charger from the power source first, then carefully remove the cables. Inspect the battery for any signs of damage or swelling. Avoid trying to reconnect the terminals until you’re sure they’re correct.
Consider using a multimeter to verify proper polarity before reconnecting. Always remember, reverse polarity can cause significant battery damage and might compromise safety. If you’re unsure about reconnecting, consult your vehicle’s manual or seek professional help.
Taking these steps quickly minimizes the risks and prevents costly repairs or replacements. Safety always comes first when handling electrical components.
Signs Your Battery Is Fully Charged and Ready to Use
Wondering how to tell when your battery is fully charged and ready to use? The first sign is that the charging process will slow down or stop altogether, showing that the battery has reached its ideal charge time. You might see the charger’s indicator light change from red to green, signaling it’s done.
Keep an eye on the battery’s health; a fully charged battery will perform better and hold a charge longer. If your charger has a built-in meter, it will show a full charge or maximum voltage. Avoid overcharging, as it can harm your battery’s health over time.
Once the charging stops or the indicator shows full, give your battery a few minutes to stabilize before disconnecting. This helps ensure it’s truly ready for use. Properly charged batteries are more reliable, last longer, and perform at their best, so it’s worth paying attention to these signs.
Frequently Asked Questions
Can I Charge a Damaged or Leaking Battery Safely?
You shouldn’t charge a damaged or leaking battery because it’s unsafe and can make things worse. Damaged batteries can be risky to handle and need special care.
Leaking batteries release harmful chemicals, which makes charging them dangerous. Always check your battery first, and if you see leaks or damage, dispose of it properly.
Follow proper charging precautions to avoid accidents. It’s usually best to replace a damaged or leaking battery rather than trying to recharge it.
What Safety Gear Should I Wear During Charging?
You should wear safety goggles and rubber gloves during charging to protect yourself from potential sparks, acid splashes, or harmful fumes.
Safety goggles shield your eyes from splashes or debris, while rubber gloves prevent acid contact and electrical shocks.
Always guarantee good ventilation and keep a fire extinguisher nearby. These precautions help keep you safe while handling batteries, especially if they’re damaged or leaking.
How Long Can I Leave the Charger Connected?
You should generally leave the charger connected for about 12-24 hours, but always follow your battery manufacturer’s recommended charging time for the best results.
Overcharging can harm your battery, so try not to leave it plugged in too long. Keep an eye on both the charger and the battery during the process.
Once the recommended time has passed, disconnect the charger to avoid overcharging. This helps keep your battery healthy and reliable.
Is It Safe to Charge a Frozen Battery?
Think of it like a scene from a sci-fi movie—charging a frozen battery isn’t safe. Frozen battery effects include potential cracking and damage, so you should never charge it when fully frozen.
Follow charging temperature guidelines, making sure the battery is thawed to at least 32°F before you plug it in. Doing this minimizes risks, prevents damage, and keeps you safe during the process.
Always err on the side of caution when dealing with cold batteries.
Can I Use a Car Battery Charger for Other Types of Batteries?
You can use a car battery charger for other types of batteries, but you should check if it’s compatible first. Different batteries like deep cycle, marine, or lead-acid need specific charging settings.
Always read the charger’s label to make sure it supports your battery type. Using the wrong charger can damage the battery or be unsafe.
Conclusion
Now that you know the proper steps to hook up your battery charger, you’re ready to do it safely and confidently.
Remember, a well-maintained battery is the backbone of your vehicle’s reliability. Think of it as the heart that keeps your journey alive.
With patience and attention, you’ll ensure your battery’s health and longevity. What once seemed intimidating will now feel like a simple routine of care.
Your vehicle’s well-being is just a connection away, and using a battery charger correctly makes all the difference.