Mastering Engine Diagnosis: A Comprehensive Guide to Troubleshooting Car Issues
Many car owners find engine issues frustrating and often feel overwhelmed trying to figure out what’s wrong. You’re not alone—troubleshooting engine problems can seem tricky, especially if you’re not sure where to start.
Mastering engine diagnosis can make a huge difference, helping you identify and fix problems quickly and save money.
Mastering engine diagnosis helps you identify and fix car problems quickly and cost-effectively. You’ll learn about how engines work, recognize warning signs, and use essential tools like OBD-II scanners and compression testers.
Visual checks, error code analysis, and sensor data interpretation are key steps. If you get stuck or uncertain, knowing when to seek professional help can save your engine.
Keep exploring, and you’ll uncover detailed troubleshooting techniques to keep your vehicle running smoothly.
Key Takeaways
- Understand how your engine works and be aware of warning signs like warning lights, strange noises, or drops in performance.
- Use diagnostic tools such as scan tools, compression testers, and do visual inspections to find issues accurately.
- Read and interpret error codes from OBD-II scanners to identify specific engine problems.
- Perform targeted tests on fuel systems, ignition parts, and compression to diagnose internal engine issues.
- If warning signs continue or problems are complex, seek professional help to ensure safe and effective repairs.
How Do Engines Work and What Common Problems Occur?
Understanding how engines work is key to diagnosing common problems effectively. At its core, the engine converts fuel into motion through internal combustion.
Knowing how engines operate helps you diagnose and fix common issues with confidence.
Fuel mixes with air, gets compressed, and is ignited by a spark, producing power that turns the crankshaft. This process depends on several precise components working together, like pistons, valves, and the ignition system.
If any part malfunctions, it can cause issues like misfires, rough idling, or decreased fuel efficiency. For example, worn spark plugs can lead to misfires, while a clogged fuel filter can reduce power.
Over time, parts like sensors or the timing belt might fail, leading to engine hesitation or stalling. Recognizing these common problems requires a basic understanding of how the engine operates.
Knowing these fundamentals helps you identify when something’s wrong and troubleshoot more effectively before problems get worse.
What Warning Signs Indicate Engine Trouble?
If you start hearing weird noises coming from your engine, that’s usually a sign something’s not quite right. Don’t brush it off—pay attention to what your car is telling you. Also, keep an eye on those warning lights lighting up on your dashboard; they’re there for a reason and shouldn’t be ignored.
And if you notice your car suddenly doesn’t perform like it used to—like it’s sluggish or struggling to accelerate—that could be a sign there’s an underlying problem. It’s always better to check things out sooner rather than later to avoid bigger issues down the road.
Unusual Engine Noises
Have you ever heard a strange noise coming from your engine and wondered what it might mean? Unusual engine noises are often warning signs of trouble. You might notice engine knocking, which indicates poor fuel combustion, or clicking sounds that suggest issues with your valves or lifters.
Exhaust noise could signal leaks or blockages, while idle irregularities might point to a faulty sensor or vacuum leak. Engine backfiring is a sign of ignition problems, and rattling vibrations often mean loose components or worn belts.
Whining noises could be a failing power steering pump, and hissing sounds might indicate a vacuum leak or radiator issue. Paying attention to these sounds helps you identify problems early, preventing costly repairs down the line.
Warning Lights Illuminate
When a warning light flashes on your dashboard, it’s your vehicle’s way of alerting you to potential engine trouble. Understanding what these warning lights mean is essential because each one signals a specific issue that needs your attention.
For example, a glowing check engine light indicates a problem with your engine’s emissions system or sensors. The oil pressure warning light warns of low oil levels or pressure, which could damage your engine if ignored. The temperature warning light signals that your engine is overheating and needs immediate action.
Recognizing these dashboard alerts helps you respond quickly and can prevent costly repairs. Never dismiss warning lights as minor—they’re your vehicle’s way of communicating important engine health information.
Addressing warning signs promptly keeps your engine running smoothly and helps you avoid further damage.
Performance Drop Noticed
A noticeable drop in your vehicle’s performance often signals underlying engine issues that need immediate attention. You might notice reduced acceleration, sluggish response, or a rough idle.
These signs can also lead to decreased fuel efficiency, costing you more at the pump. If your engine feels less powerful despite proper maintenance, it could be time for performance tuning or engine upgrades.
Keep an eye on your vehicle’s overall health with regular maintenance tips, such as checking air filters and spark plugs. Failing to address performance drops early can lead to more severe problems, like increased emissions or engine damage.
Recognizing these warning signs promptly helps you troubleshoot effectively and guarantees your engine runs smoothly for longer.
What Tools Do You Need to Diagnose Your Engine?
To effectively diagnose your engine, you’ll need a few crucial tools that help you identify issues accurately. Diagnostic tools like scan tools and automotive software allow you to read error codes directly from your vehicle’s computer, pinpointing trouble areas quickly.
An engine analyzer can provide real-time data on engine performance. A multimeter is critical for troubleshooting electrical problems. Know how to use it for testing sensors and wiring.
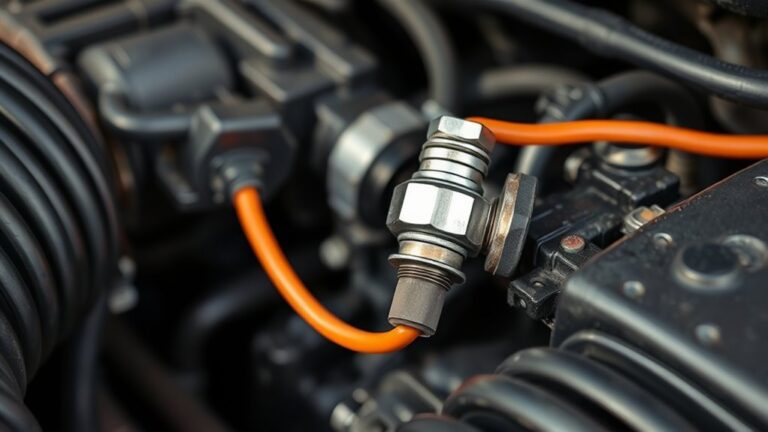
A compression tester helps assess the health of your engine’s cylinders, while checking fuel pressure guarantees your fuel delivery is within specifications. A spark tester confirms if your ignition system is working properly, and a timing light helps you verify ignition timing.
For exhaust-related issues, a smoke machine can detect leaks. These tools, when used correctly, give you a thorough picture of your engine’s health and are indispensable for effective troubleshooting.
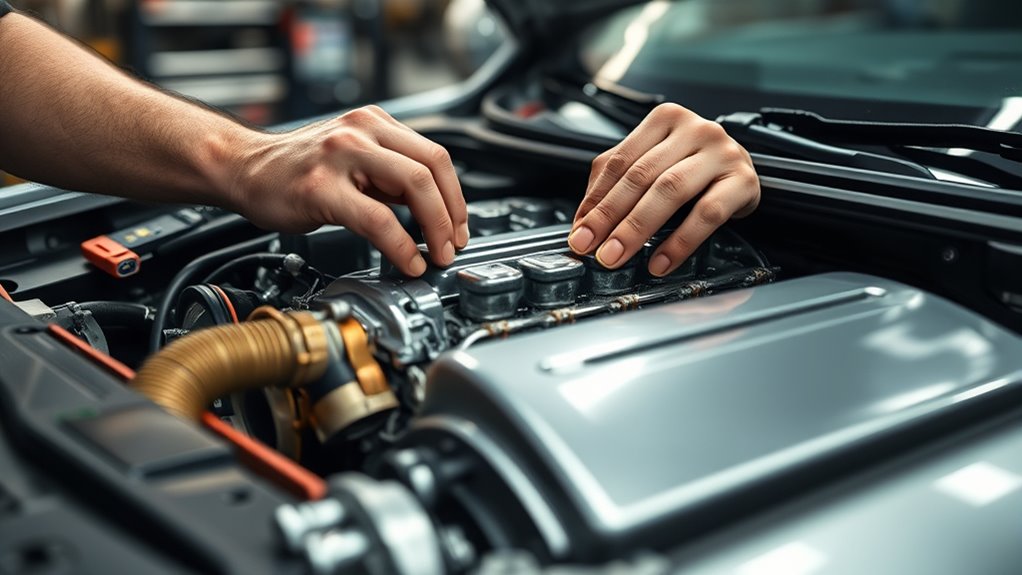
How to Perform Visual Checks for Leaks, Damage, and Other Issues
Performing a thorough visual inspection is one of the quickest ways to spot potential engine issues. Start by checking for leak detection around the engine bay. Look for oil, coolant, or fluid puddles that could indicate a leak.
Next, do a damage assessment by inspecting hoses for cracks, swelling, or leaks. Also, examine belts for signs of wear or fraying. Don’t forget to review the exhaust system for rust, damage, or unusual soot buildup.
Then, perform coolant inspection to verify fluid levels are adequate. Look for any discoloration or contamination. Conduct oil checks by examining the dipstick for proper level and condition.
Finally, evaluate filters for dirt or clogging and assess the overall condition of engine components visually. Keep an eye out for any loose or damaged parts, as these can lead to bigger issues if overlooked.
How to Read Error Codes With an OBD-II Scanner
To read error codes with an OBD-II scanner, the first thing you want to do is connect it properly to your vehicle’s port. Usually, this port is located under the dashboard, near the steering column. Once you’ve got it plugged in, turn on your vehicle’s ignition — no need to start the engine, just turn the key to the “On” position.
Now, your scanner will display some codes. These codes are like a language that tells you what’s going on under the hood. You’ll need to interpret what they mean — some scanners come with a manual or a smartphone app that can help translate these codes into plain language. Once you’ve figured out what the codes indicate, you can work on fixing the issues.
After you’ve addressed the problems, it’s a good idea to clear those fault codes from the system. This way, you can check later to see if any new issues pop up. Just remember, getting a good connection and understanding what the codes mean are key steps to effectively diagnosing your engine’s health.
Connecting the Scanner Properly
Connecting the scanner properly is the first step to accurately reading error codes from your vehicle. To do this, choose the right scanner type and use the correct connection method.
Different scanner types include basic code readers and advanced diagnostic tools, each with unique features. When connecting, make sure your vehicle is off, then locate the OBD-II port, usually under the dashboard.
Use the appropriate connection method, like a cable or wireless link, to connect the scanner securely. Double-check that the connection is firm before turning on the ignition.
This ensures reliable data transfer and accurate readings.
Interpreting Error Codes
When you turn on your OBD-II scanner and connect it to your vehicle, it will display error codes if there are any issues. These codes point to specific problems, and understanding what they mean helps you diagnose the car better.
Error code meanings can vary, but many common ones relate to sensors, emissions, or fuel systems. To interpret these codes, check your scanner’s display or your vehicle’s manual.
Here’s a quick reference table to help you understand some typical error codes:
| Error Code | Meaning / Common Code Triggers |
|---|---|
| P0171 | Fuel system lean condition |
| P0300 | Random or multiple cylinder misfire |
| P0420 | Catalyst system efficiency below threshold |
| P0455 | Evaporative emission control system leak |
| P0500 | Vehicle speed sensor malfunction |
This table helps you connect error codes to their common causes, making troubleshooting more straightforward.
Clearing Fault Codes
After you’ve identified the error codes with your OBD-II scanner, the next step is to clear those fault codes from the vehicle’s computer. Fault code clearing resets the system, making sure previous issues don’t interfere with current troubleshooting. Use your scanner’s “Clear Codes” function to remove stored error messages.
Keep in mind, clearing fault codes doesn’t fix underlying problems, so it’s important to perform thorough troubleshooting afterward. If issues persist, the codes will likely come back. Before clearing, confirm that repairs are complete or diagnosis is confirmed.
Proper fault code clearing helps verify if repairs have resolved issues and prevents false alerts. Remember to wait for the system to reset before rechecking for error codes. Document the process for future troubleshooting to keep track of what’s been done.
Diagnosing Fuel System and Ignition Problems
Troubleshooting fuel system and ignition problems can seem challenging, but a systematic approach makes it manageable. Start by inspecting the spark plugs; worn or fouled plugs can cause misfires.
Next, perform fuel pressure testing to verify your fuel pump delivers the correct pressure. Low pressure often indicates a failing pump or clogged fuel filter. Check for fuel injector issues by listening for clicks during engine startup or using a spray test to see if the engine responds.
Ignition coil failures are common causes of misfire. Test each coil for proper resistance and spark output. Conduct a thorough spark plug inspection for signs of damage or carbon buildup.
If these components seem fine, consider inspecting the wiring and connectors for corrosion or damage. By methodically evaluating these areas, you’ll identify whether your issue stems from fuel delivery, ignition, or electrical faults, guiding effective repairs.
How to Check Compression and Vacuum Levels
Checking compression and vacuum levels is a key step when diagnosing engine problems. It shows the condition of your cylinders and overall engine health. Compression testing measures the pressure inside each cylinder, helping you spot worn piston rings, valves, or head gaskets.
Compression and vacuum tests reveal engine health and help identify internal issues early.
Vacuum testing checks how well the engine maintains proper airflow and can reveal leaks or restrictions. Both tests give you important clues about what’s happening inside your engine.
To do a compression test, start by removing the spark plugs and disabling fuel injection. Then, insert a compression gauge into each cylinder and crank the engine to get pressure readings. Compare these to your vehicle’s specifications and repeat for consistency.
For vacuum testing, attach a vacuum gauge to a port on the intake manifold. Start the engine and watch the steady reading. Listen for hissing sounds that might mean leaks, and note any fluctuations that could point to valve or gasket problems.
These simple tests can help you understand your engine’s health and catch internal issues early.
How to Interpret Sensor Data to Find Engine Faults
To interpret sensor data effectively, it’s important to get familiar with the different types of sensors and what they do in monitoring your engine’s performance. Each sensor has its own role, whether it’s measuring temperature, pressure, or airflow, so understanding these helps you make sense of the data you’re seeing.
Once you know what each sensor is supposed to be reporting, you can start looking for patterns or anomalies in the data. If something seems off—like sudden spikes or drops—that could be a sign of a problem. Spotting these irregularities early on is key to catching engine issues before they get worse.
Finally, recognizing the main fault indicators within the data allows you to pinpoint potential engine problems more quickly. This way, you can take action sooner, hopefully saving yourself from costly repairs down the line.
Understanding Sensor Types and Roles
Sensors are like the eyes and ears of your engine management system, giving you crucial data to spot potential issues. Knowing the different sensor types and what they do is key to understanding how your engine runs.
Each sensor has a specific role, such as monitoring temperature, pressure, or oxygen levels. These readings are vital for keeping your engine efficient and controlling emissions.
Some of the main sensors include oxygen sensors, which check exhaust gases and adjust the fuel mixture. Throttle position sensors track how much the throttle is open and how the engine responds.
MAP sensors measure the pressure in the intake manifold to help with fuel delivery. Coolant temperature sensors keep an eye on engine temperature to prevent overheating. MAF sensors assess airflow to optimize fuel injection.
Understanding what each sensor does helps you interpret data better and troubleshoot engine problems more effectively.
Analyzing Sensor Data Patterns
Understanding sensor types and their functions is key to interpreting the data they produce.
To analyze sensor data patterns effectively, focus on spotting data anomalies that don’t match normal readings. These irregularities can point to potential engine problems.
Use real-time monitoring to catch sudden changes quickly, while comparing historical data helps identify long-term trends. Proper sensor calibration is essential for accurate data, making it easier to distinguish real issues from false alarms.
Think about sensor integration; multiple sensors working together can confirm or rule out specific problems. By recognizing consistent patterns and irregularities, you can diagnose engine faults more accurately.
This approach helps you pinpoint issues efficiently, saving time and avoiding unnecessary repairs.
Identifying Fault Indicators
How can you tell if your engine is experiencing a fault just by analyzing sensor data? Look for signs like inconsistent readings, which can indicate faulty sensors. These faulty sensors might cause engine misfires or false alerts, making it harder to diagnose real issues.
Increased coolant levels could signal overheating problems, so keep an eye on those. Irregular air intake or exhaust readings might point to exhaust system issues that need attention.
Sudden drops in oil quality or coolant levels can suggest leaks or worn components that could lead to bigger problems if not addressed. Electrical failures may show up as erratic sensor signals, giving you early warning signs.
Recognizing these indicators helps you pinpoint issues early, whether it’s faulty sensors, engine misfires, fuel leaks, or overheating. Being aware of these signs can save you time and money on repairs.
What’s the Next Step If You Can’t Fix It Yourself?
When you’ve tried troubleshooting your engine but still can’t fix the issue, the next step is to seek professional help. A qualified mechanic can perform diagnostic services to pinpoint the problem accurately. They have the tools and expertise to interpret error codes and assess your engine’s condition effectively. Relying on mechanic recommendations guarantees you get the right repair without risking further damage.
Here’s a quick guide on what to take into account:
| Step | Action | Purpose |
|---|---|---|
| 1 | Visit a trusted mechanic | Professional diagnosis |
| 2 | Ask for diagnostic services | Accurate fault detection |
| 3 | Follow mechanic recommendations | Correct repairs |
| 4 | Get a detailed estimate | Budget planning |
Don’t hesitate to seek expertise when DIY efforts fall short. Proper diagnosis saves time and money in the long run.
When Should You Seek Professional Help for Engine Problems?
Knowing when to call in a professional can save you time, money, and frustration. If your engine shows persistent issues or strange symptoms, it’s time to seek expert help.
Relying only on basic engine maintenance might not catch complex problems. Professional diagnostics can identify underlying issues that simple checks miss. Consider consulting a mechanic if you notice:
- The engine warning light stays on after initial checks
- Unusual noises or vibrations during operation
- Significant loss of power or acceleration
- Excessive smoke or unusual odors
- Difficulty starting or frequent stalling
Trying to fix problems beyond your skill level can make things worse. A professional diagnosis guarantees accurate identification and proper repair, saving you from costly mistakes.
When engine problems stick around despite basic troubleshooting, it’s best to trust a trained technician to handle the issue safely and efficiently. Recognizing these signs helps you know when to prioritize professional engine maintenance.
Frequently Asked Questions
How Often Should I Perform Engine Maintenance to Prevent Issues?
You should perform engine maintenance every 3,000 to 5,000 miles, or as recommended by your vehicle’s manufacturer. This includes regular oil changes and fluid checks to prevent issues.
Keep an eye on your oil level, coolant, and transmission fluid, and top them off when needed. Regular maintenance helps your engine run smoothly, reduces breakdowns, and extends your car’s lifespan.
Stay proactive to avoid costly repairs later. Following a consistent maintenance schedule will keep your vehicle in good shape and save you money in the long run.
Can Engine Problems Be Caused by Poor Driving Habits?
Yes, poor driving habits can cause engine problems. Aggressive driving techniques like rapid acceleration and hard braking lead to increased engine wear over time.
Neglecting proper driving habits puts stress on engine parts, which can cause early failures or reduce performance.
To avoid these issues, focus on smooth acceleration, gentle braking, and regular maintenance.
Good driving habits can help extend your engine’s lifespan and keep it running smoothly.
What Are the Best Practices for Maintaining Engine Longevity?
Like a well-oiled machine, you boost engine longevity by sticking to regular oil changes and checking coolant levels to prevent overheating. Use high-quality fuel, keep your air filters clean, and make sure ignition timing is accurate.
Regular engine tuning helps maintain efficiency, and fixing minor issues early prevents bigger problems later on.
Consistent maintenance guarantees your engine runs smoothly, much like a vintage car preserved in mint condition.
How Do Environmental Conditions Affect Engine Performance?
Environmental conditions greatly impact your engine’s performance. Poor fuel quality can cause knocking or misfires, and temperature extremes affect cooling and oil viscosity.
High humidity levels might lead to corrosion, while at high altitudes, reduced air density can impact combustion. Also, pollutants in the air can clog filters and sensors.
To keep your engine running smoothly, regularly check your fuel and air filters. Be sure to adapt your maintenance for climate and altitude changes.
Are Aftermarket Parts Reliable for Engine Repairs?
Aftermarket parts can be reliable if you choose high-quality options, but you need to evaluate part compatibility carefully. Not all aftermarket quality matches OEM standards, so it’s important to research brands and reviews before buying.
When installed correctly, they can perform well and save you money. But keep in mind, lower-quality parts might cause issues or even fail early.
Always verify that the aftermarket part fits your engine properly and comes from a reputable manufacturer. That way, you can help ensure long-term reliability.
Conclusion
When your engine starts acting up, don’t panic. With the right tools and knowledge, you can often identify issues early—like a car that stalls unexpectedly due to a faulty sensor.
Imagine catching a small leak before it causes costly damage. That’s the power of proper diagnosis. If you get stuck, knowing when to call a pro ensures you don’t make things worse.
Mastering engine diagnosis skills keeps your engine running smoothly and saves you money in the long run.